Log in
Click HERE to go to the login page.
Business account
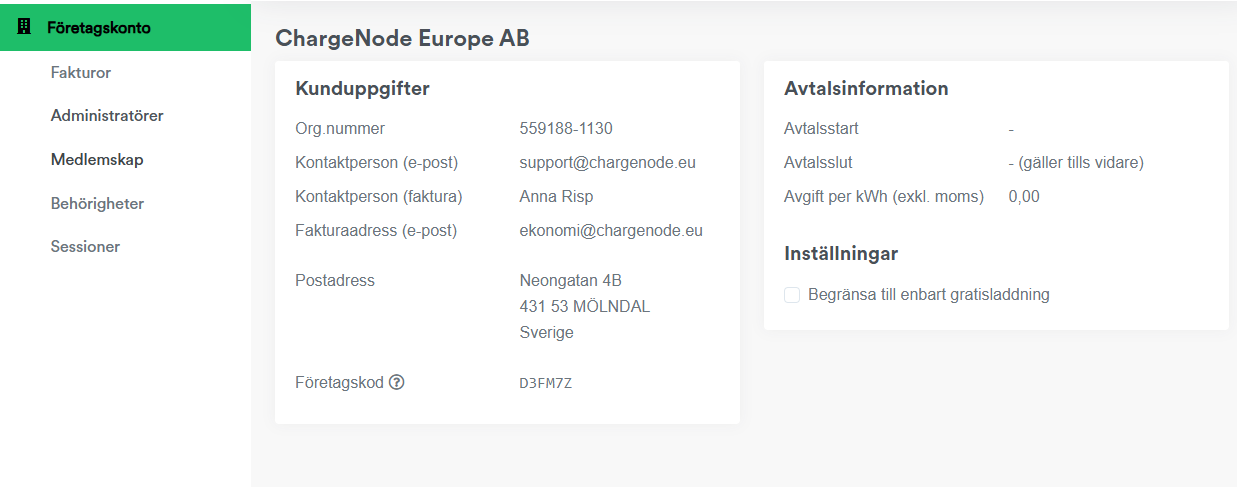
On the home page of the business account portal, the company's details are displayed according to your agreement. For changes, please contact support@chargenode.eu.
The company code is the code needed to be able to charge in private areas, read more HERE.
"Restrict to free charging only" means that users on the business account can only charge in areas where the charging price is 0 kr.
Video walkthrough of the home page:
Invoices
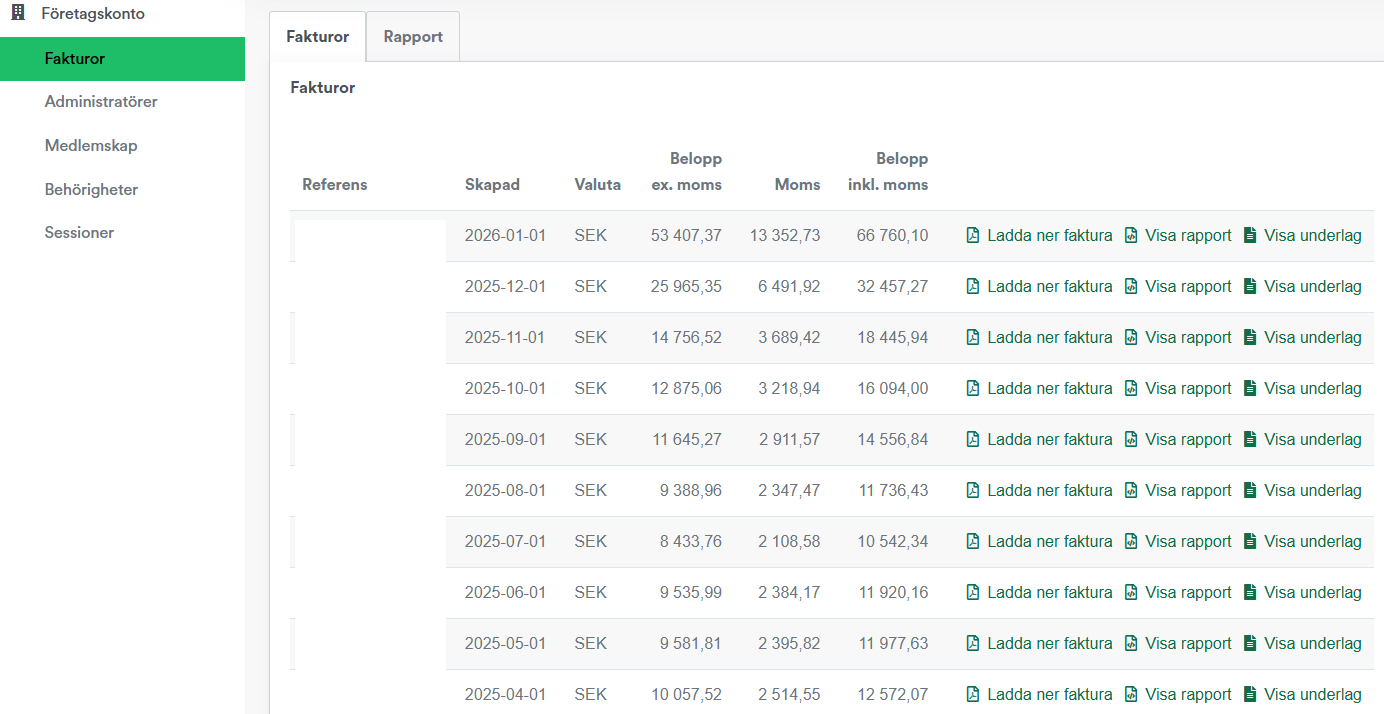
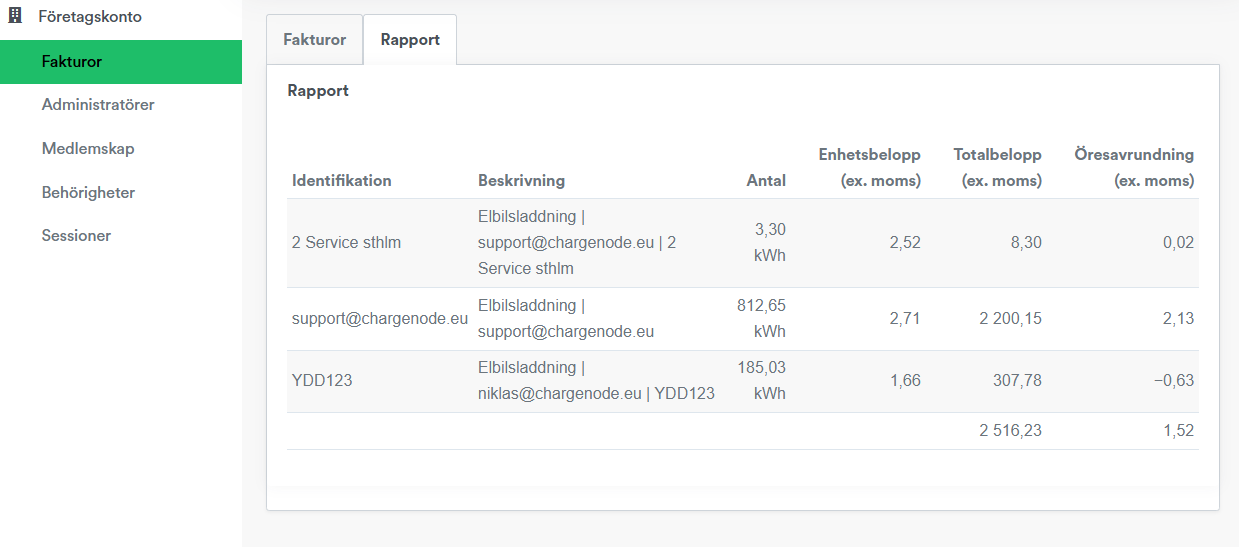
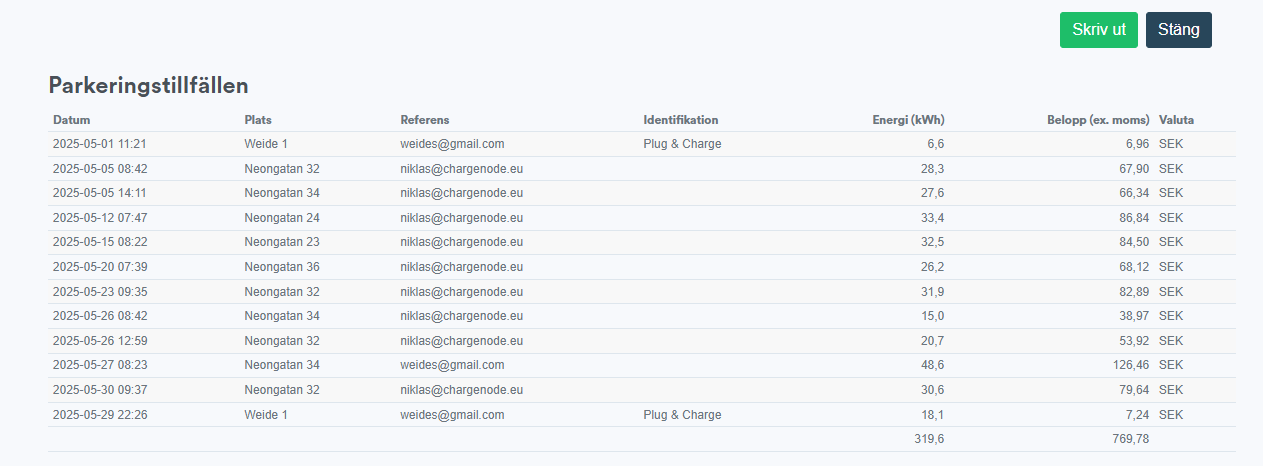
Here you can download invoices, view a report with the number of charged kWh per user, and retrieve documentation that summarises all charging sessions per month.
Video walkthrough of the Invoices tab and its features:
Administrators
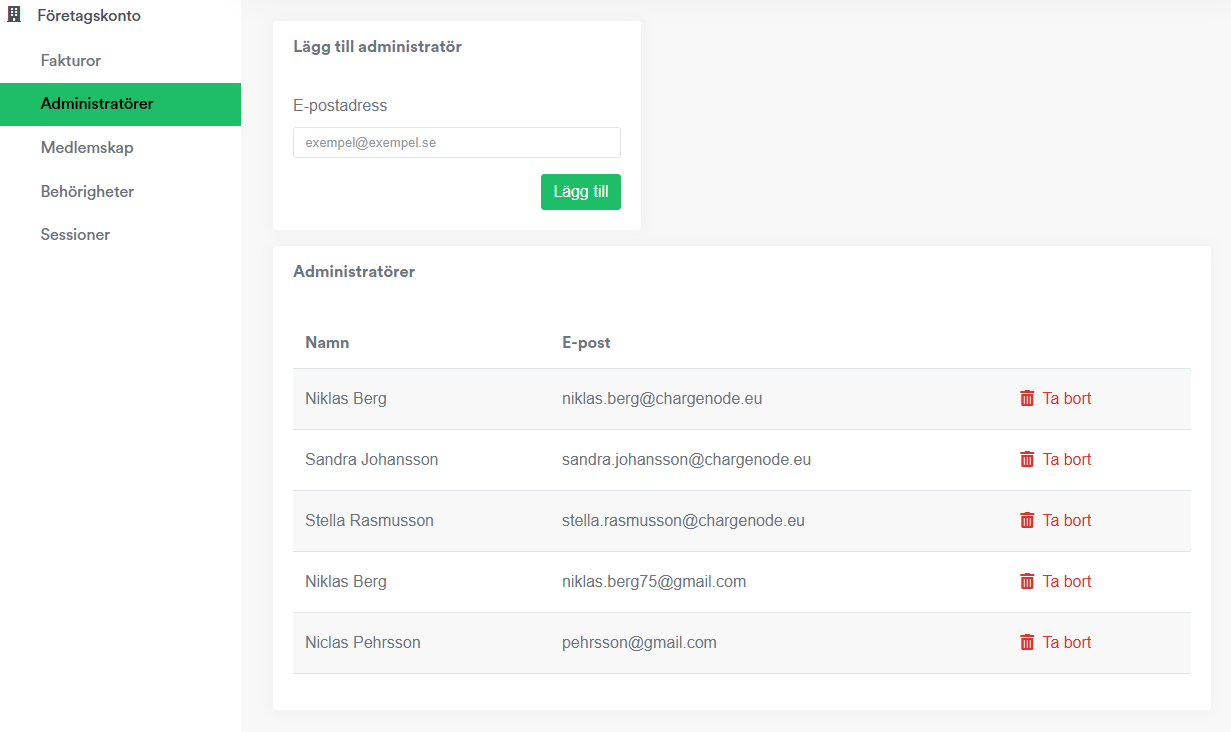
Under "Administrators" you can add or remove people with administrator rights for the business account.
Video walkthrough of the Administrators tab:
Membership
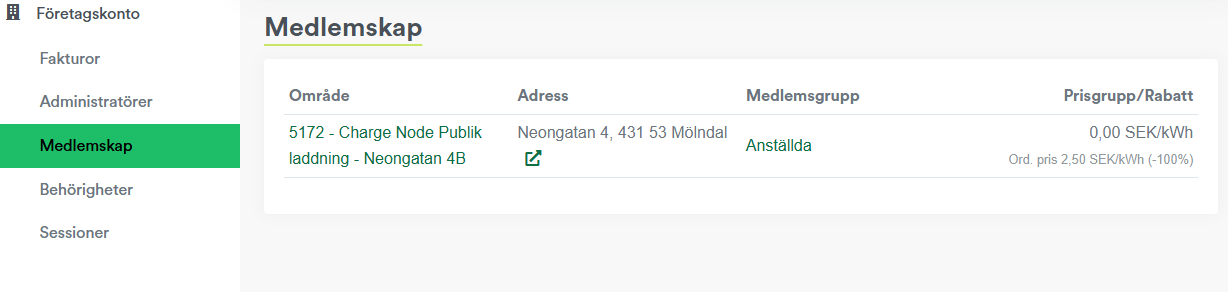
If the business account is a member of an area, the membership is shown here, along with which member group the account belongs to and what price has been assigned.
Read HERE to see how to be added as a member of a private area.
Permissions
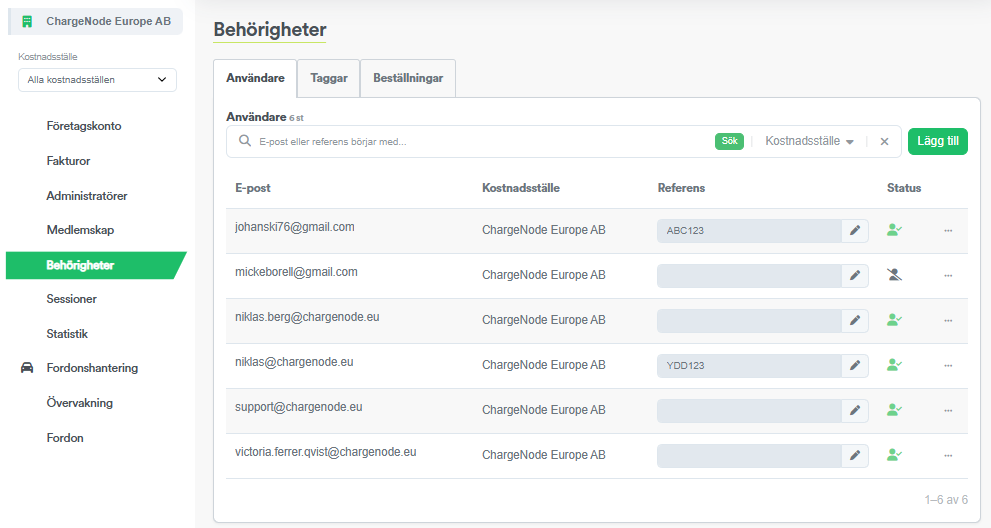
Under "Permissions", administrators can manage which users have access to charge on the business account.
Users
To add permissions, click "Add", enter the email address and an optional reference. The reference can be edited afterwards and is visible on the invoice basis and in reports.
The person being added will then receive an email stating that they have permission to charge on the business account. New users first need to download the ChargeNode app and register an account using the email address the invitation was sent to. Once registration is complete, or for users who already have an account, the business account will automatically appear as a selectable payment method in the ChargeNode app.
Users with grey status have not yet registered in the ChargeNode app, while green status means they have registered and are up and running.
Tags
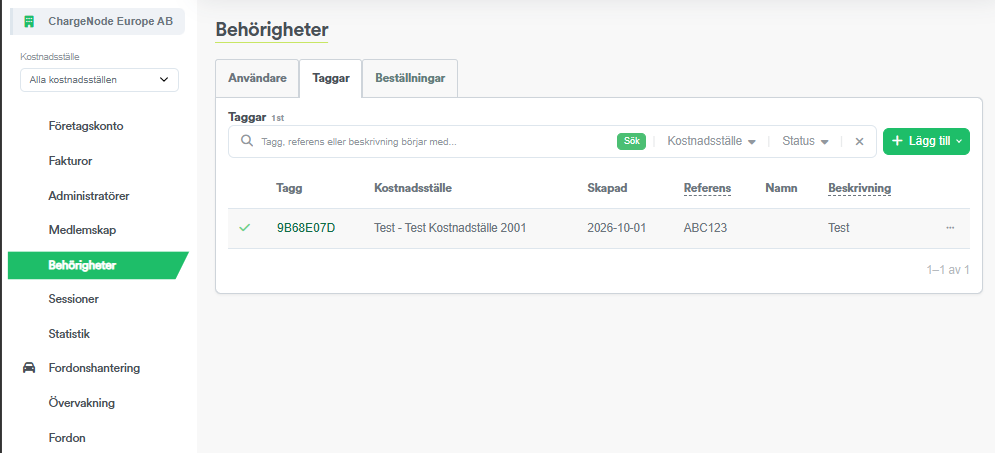
Here the number of RFID tags and their identification numbers are displayed.
The identification number is what appears on the invoice documentation and in reports. It can be edited afterwards, and it is common to enter the vehicle registration number or the tag number for easier administration.
Tags to be linked to the business account are currently ordered via email to support@chargenode.eu by an administrator. It is also possible to register existing RFID tags directly on the business account by clicking "Add RFID". The tag number must then be entered in Hex format, and there are special readers or apps available for this.
A green tick means the tag is active, while a red block means the tag is blocked for charging. If you wish to block a tag, for example in the case of a lost tag, please contact support@chargenode.eu.
Note: When integrating with leasing companies, the correct registration number is required as the identification number.
Orders
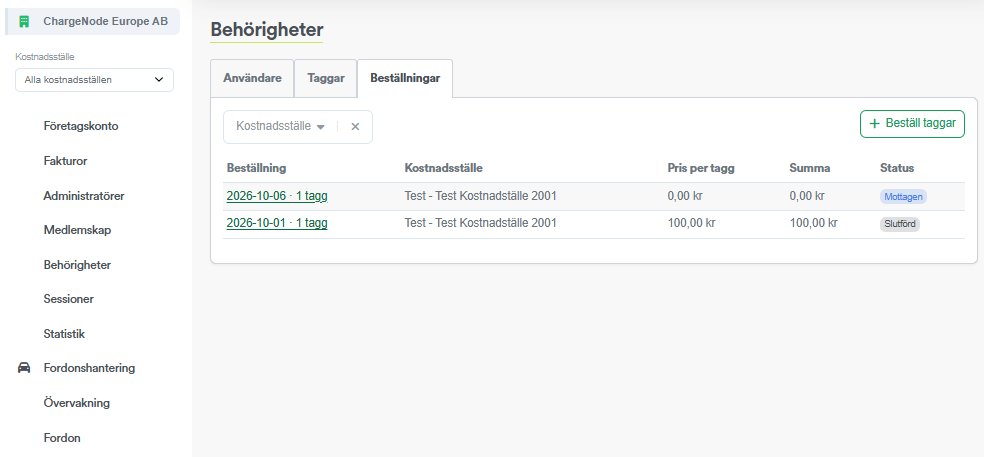
Here you can order new RFID tags. You can also see ongoing and historical orders. To order new RFID tags, press the "+Order tags" button.
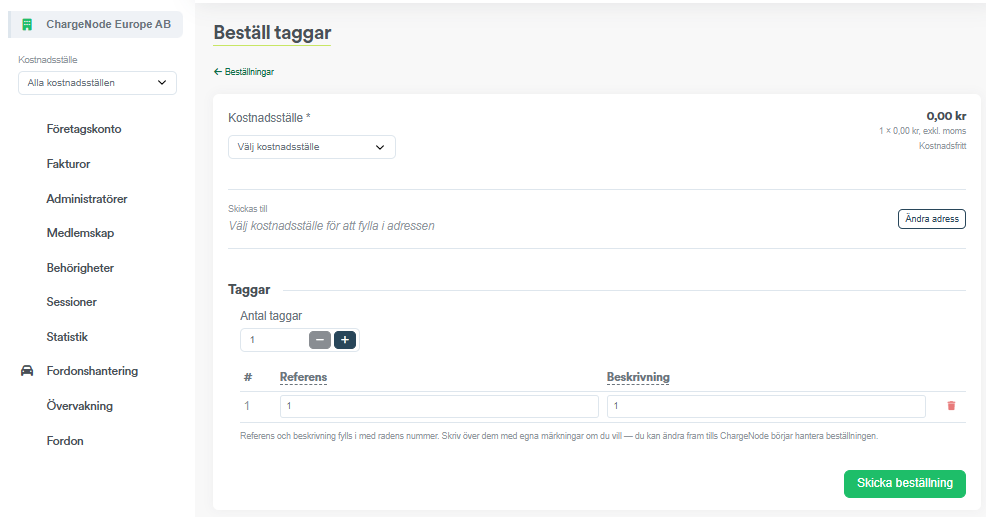
In this view, you fill in which cost centre the tags should be linked to. Also enter the delivery address where the tags should be sent. Then fill in the number of tags as well as the reference and name for the tags. These are chosen by you. Then click Submit order. We will create and send the tags as soon as the order has been processed. Under the Orders tab, you can track the status of the current order. By clicking on the order, you can cancel it if you change your mind, provided the tags have not yet been created.
Video walkthrough of the Permissions tab:
Sessions
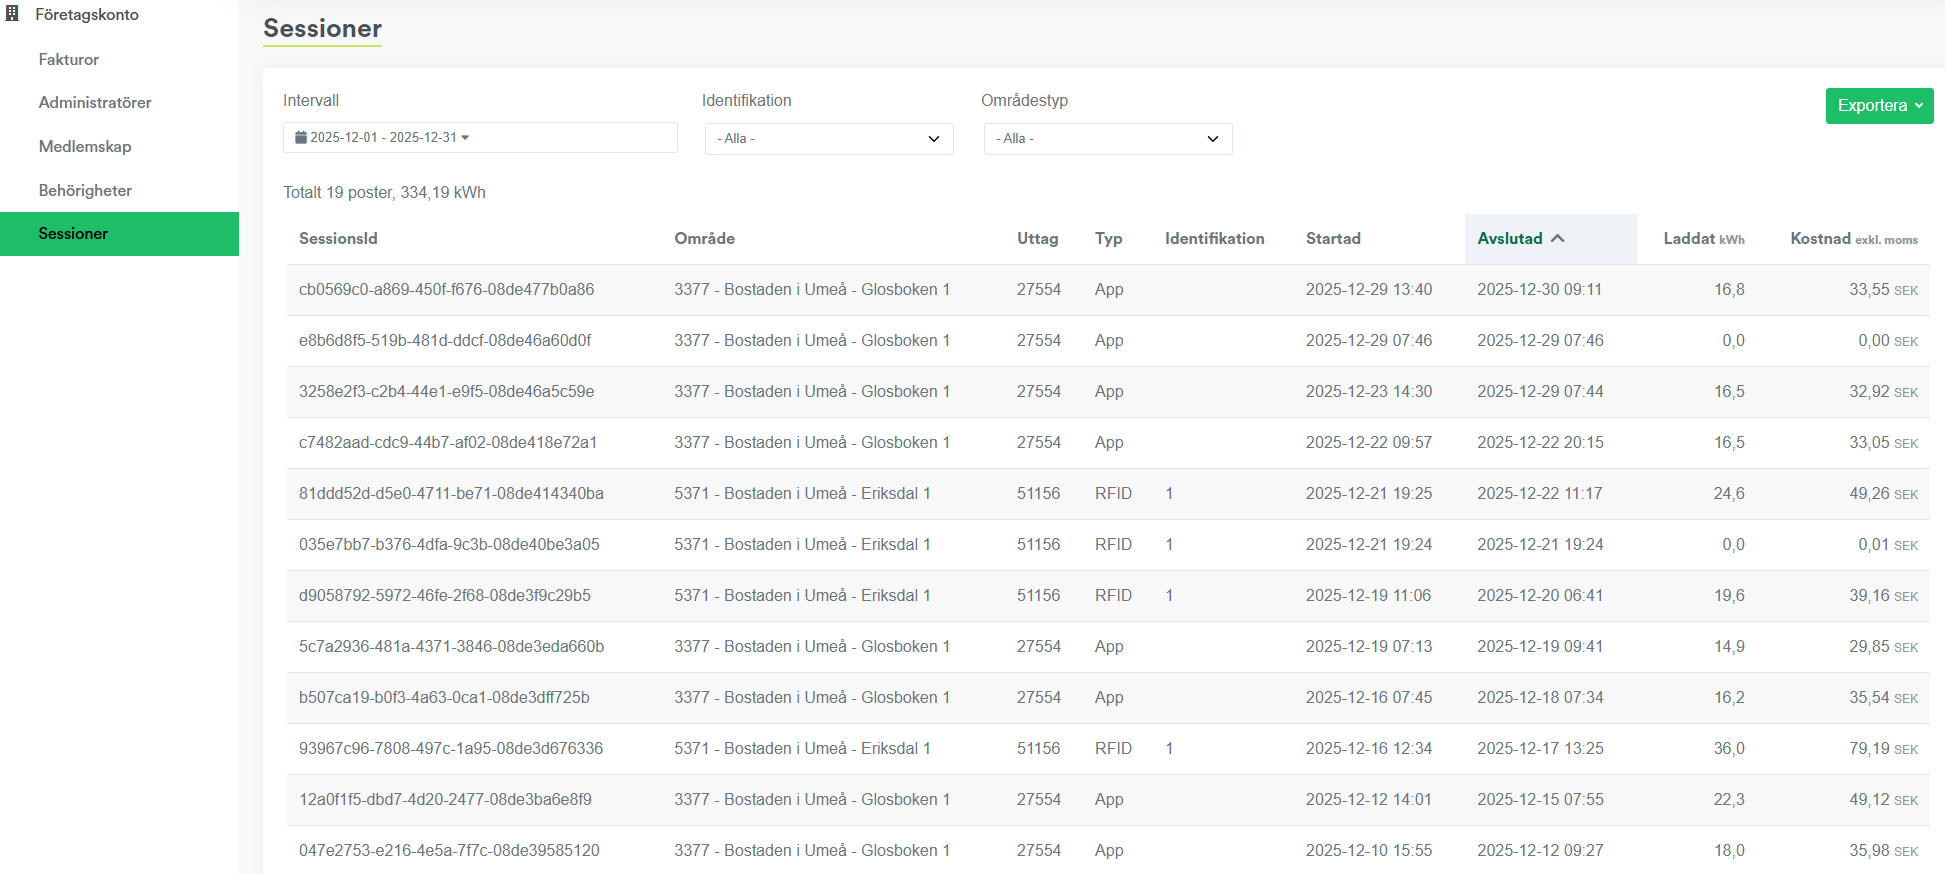
Here you can view the history of all sessions charged via the business account. You can see information about each charging session, such as area, outlet, start method (app or RFID tag), duration, amount charged, and cost. Sessions can also be filtered by different time intervals, identification, and area type.